Make a Big Impact on a Budget - Painted Book Wall
/I have been wanting to do a painted book wall as soon as I saw Ana @fiddleleafinteriors do an amazing horse painting and Shannon @livingwithlady do a beautiful floral painting.
However, I already had our book wall in the entry and I wasn't quite ready to take it down.


A few weeks ago, we were finally ready to make the library what we've been wanting all along. This meant that the original book wall was coming down and I was finally going to get the opportunity to do my painted book wall.
If you want to know how easy it is, keep reading!
Here is what you will need for this project.
Materials:
lots of books {I used what I already had so it included paperback and hardback...if you were going to goodwill to purchase some, I would suggest getting paperback - they are cheaper and will be easier to hang}
staple gun & staples
brad nailer & finishing nails
projector {unless you are good at drawing freehand}
picture of your choosing
*This post contains affiliate links – see my full Disclosure here*
***I did not do any aging to my books, but if you wanted to, you can simply age them using a cup of brewed coffee before hanging.

Step 1:
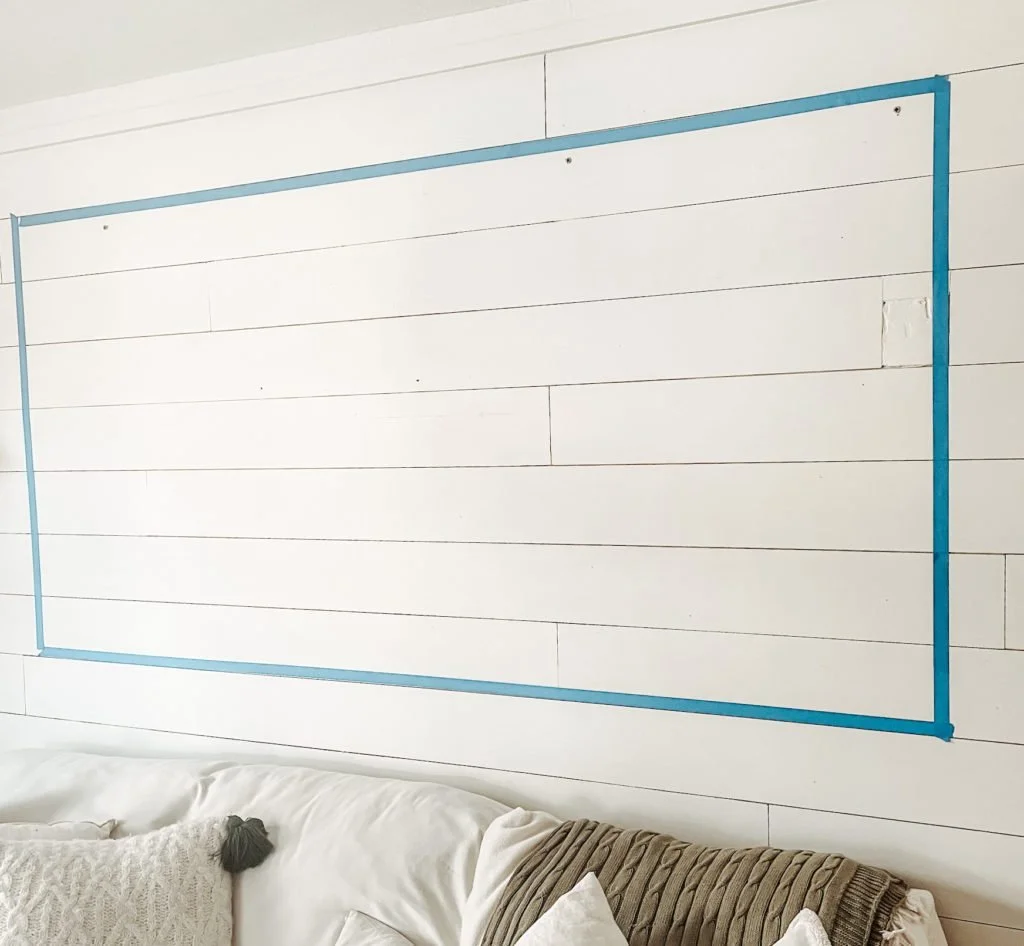
I started by taping out the area on the wall to get a feel for the space. I am normally one of those jump all in without thinking it all through kind of gals, so this was new to me, but it helped a lot! Doing this allowed me to be able to place out the books for spacing. I did this per row by laying the books on the couch {TRUST ME, you want to figure out the spacing. For the first row, I did not do this and had to take it all down}

Step 2:
I took the nail gun and started by putting one nail in, leveled it out, and then put a second nail on the other side. I put the nails a handful of pages back so the nail wouldn’t be seen, and nailed it about 1 inch from the binding of the book, on each side.


Step 3:
Once all your books are hung, depending how thick your books are, you might need to add in more nails. I found that using a staple gun was helpful for this. I would staple about 1/2 inch at a time (leaving the top page free).
The last thing to do is secure the top page. I first tried using tape, but found that a hot glue gun was more successful. This will hide those nails and staples.

***I ended up adding one more row to the bottom than originally planned. Once I did that I wanted the top row to be higher so I moved a few books up. I also added one random book at the top to fit the top stem.
Step 4:
Using a projector, project your image over your books. We have a projector that we use for outside movie nights. If you don't have one, ask a few friends to see if you can borrow one! I was able to connect my phone to the projector using bluetooth. For my image, I wanted simple. Once I found this of the florals coming out of the book, I knew it was perfect.

See how the top left stem didn't fit? This is where I added that random book :)
Once your image is placed the way you like it, now is the fun part! I used this acrylic paint marker to first outline my drawing. I found this was personally quicker then going right in with a paintbrush & paint.

Step 5:
When the outline was done, I took black acrylic paint and filled it all in. Enjoy this process...it takes time! Think of it as a little therapy session for yourself :)

Step 6:
Take a step back and see if you are happy with it. I wanted to fill in a few gaps so I added in a few more flowers.

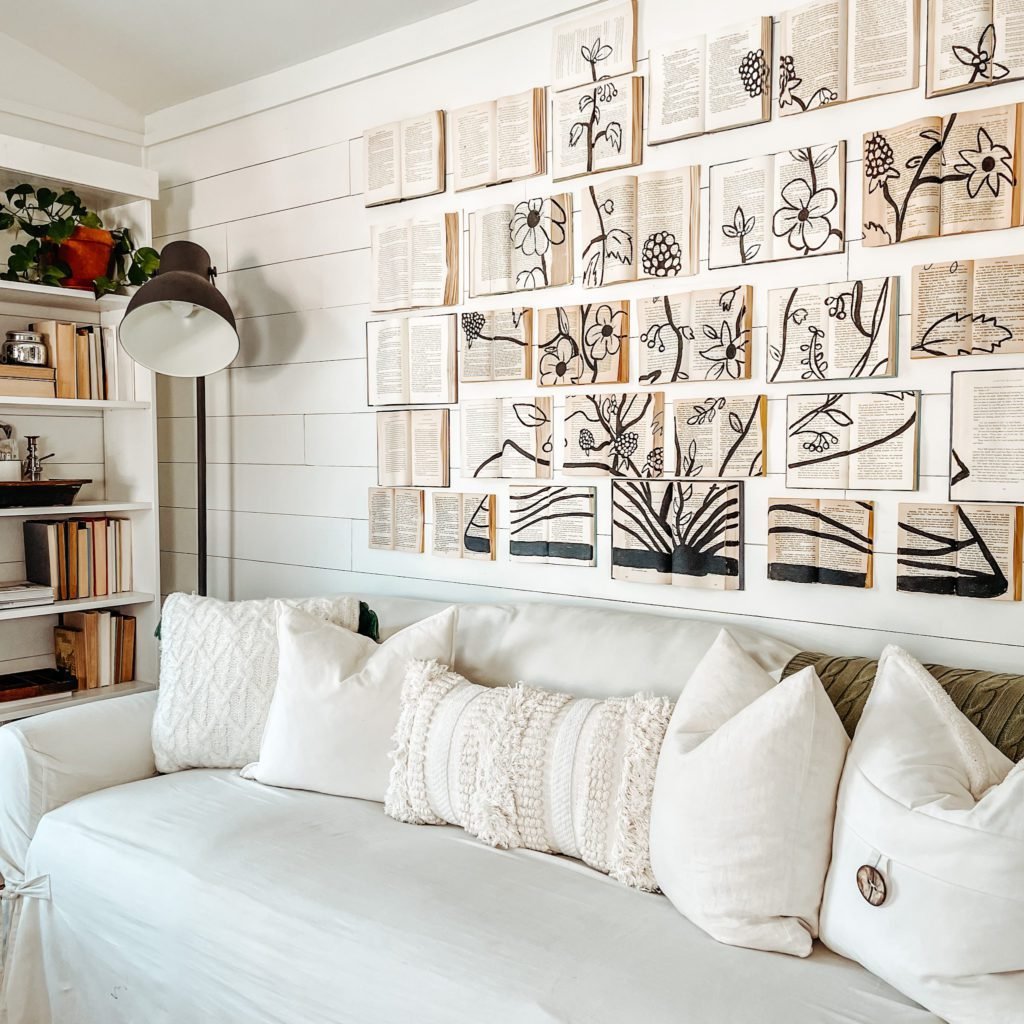

And that is all there is to it. I could not suggest doing this project more, it makes such an impact and is unique to your home.
Thank you for stopping by!