How To Make A Big Impact In The Garage With Epoxy
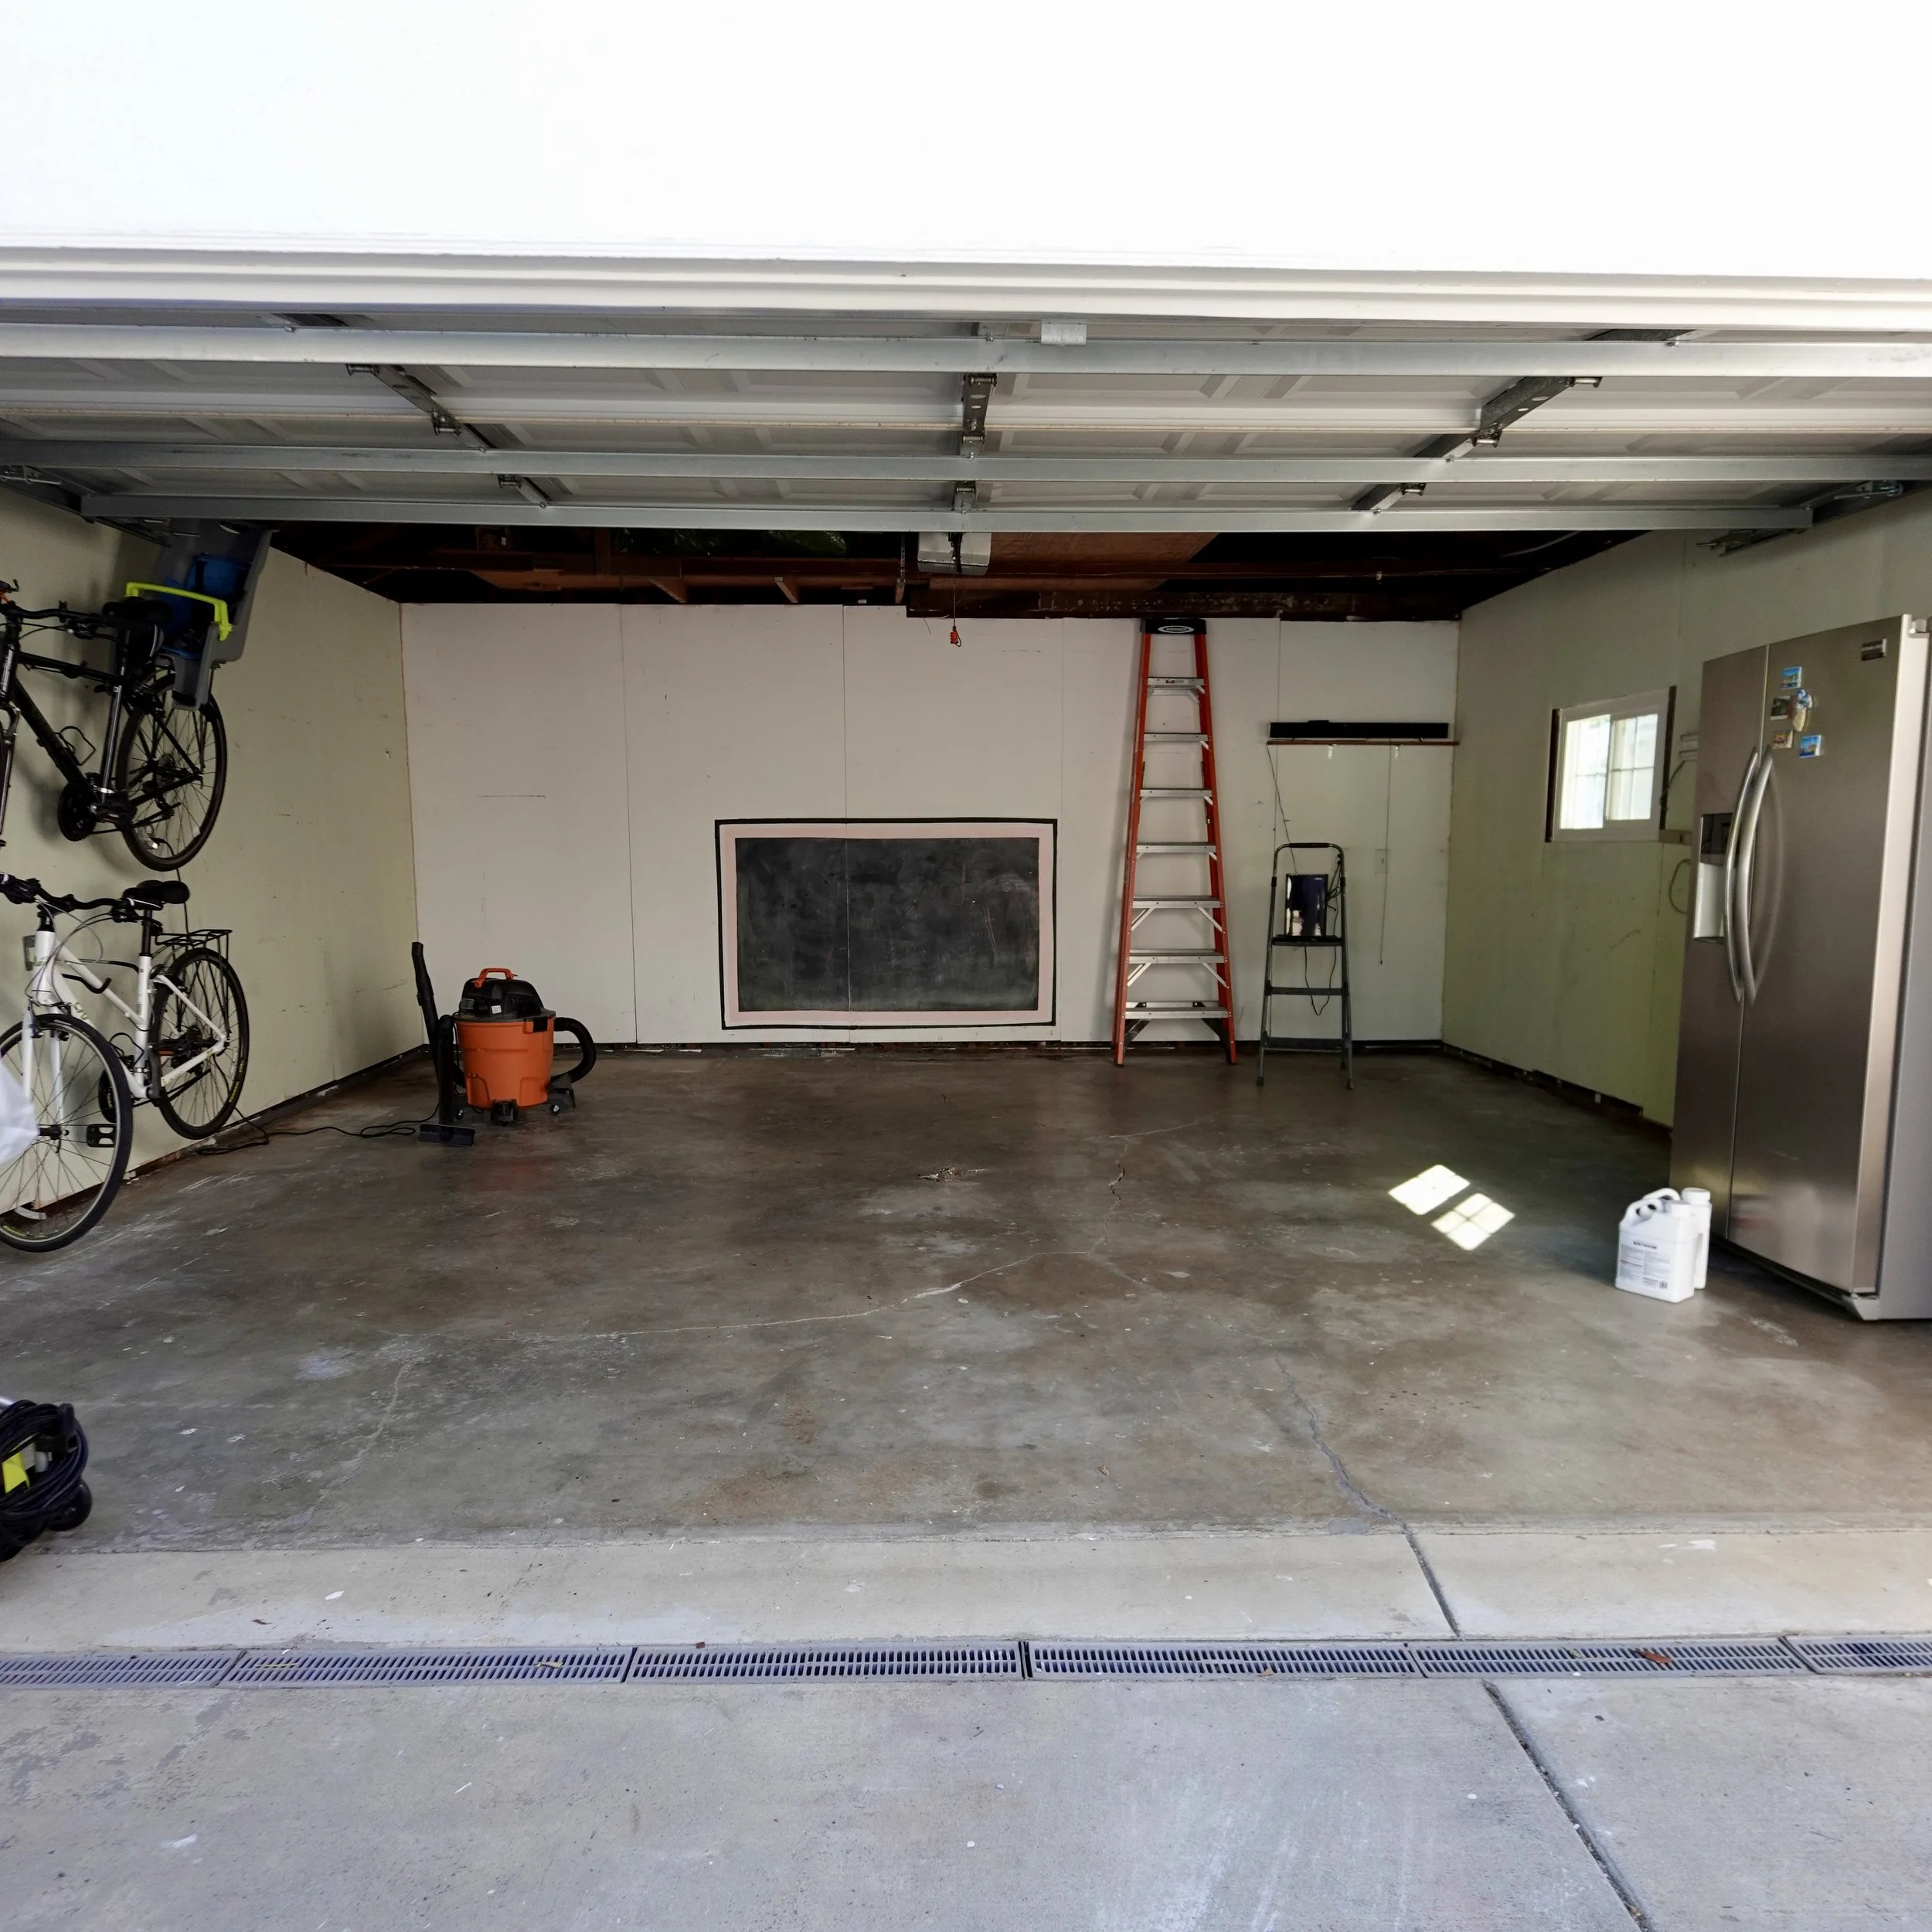
/Our garage terrified us since the day we moved in almost 6 years ago. And you know how it goes, you move stuff in and the next thing you know, it becomes that space where everything goes {it’s the Monica closet}. The time finally came to make a change. We have BIG plans for this space to make it more functional and organized, all beginning with epoxying the floor.

This project isn’t challenging, but it does take time because you have to let it dry fully between in each…and figure out where to store all your garage junk. But it is so worth it!
Materials & Tools:
Rust-oleum Concrete & Garage Recoat Primer (not necessary but we decided to use it since our garage is so old)
Rust-oleum Epoxy Shield Garage Floor Coating Kit (comes with etching & decorative color chips.) - we tinted ours to the color seafoam
Rust-oleum Decorative Color Chips (only needed if you want extra)
Pressure Washer
Paint Brush (one for epoxy and one for top coat)
Epoxy & Adhesives Paint Roller (one for epoxy and one for top coat)
Paint Tray
Bucket
*This post is not a sponsored by Rust-oleum and all opinions are solely my own. However, this post does contain affiliate links. Meaning if you purchase through my link, while it’s the same cost to you, I get a small commission {forever grateful for those who purchase through my links 😊} – see my full disclosure here*
Step 1: Prep {Degreasing, Patching & Etching}
The key is in the prep! The concrete needs to be properly prepped in order for the epoxy to adhere. We began by using Rust-oleum Cleaner & Degreaser to clean the whole slab. Because our garage is so old and has seen a lot of action, I used it full strength. After letting it sit for the amounted time, we used a deck brush to make sure we scrubbed all the stuff out. We then used our pressure washer to rinse, a broom and blower to push out the excess water. If you have a squeegee, you should definitely use that!

After letting it dry 24 hours, I filled all the cracks with Rust-oleum Concrete Patch and Repair. This stuff was magic…it is a two part epoxy to really helped to hide all the cracks and unevenness in our old garage. We then let this fully cure for 24 hours.


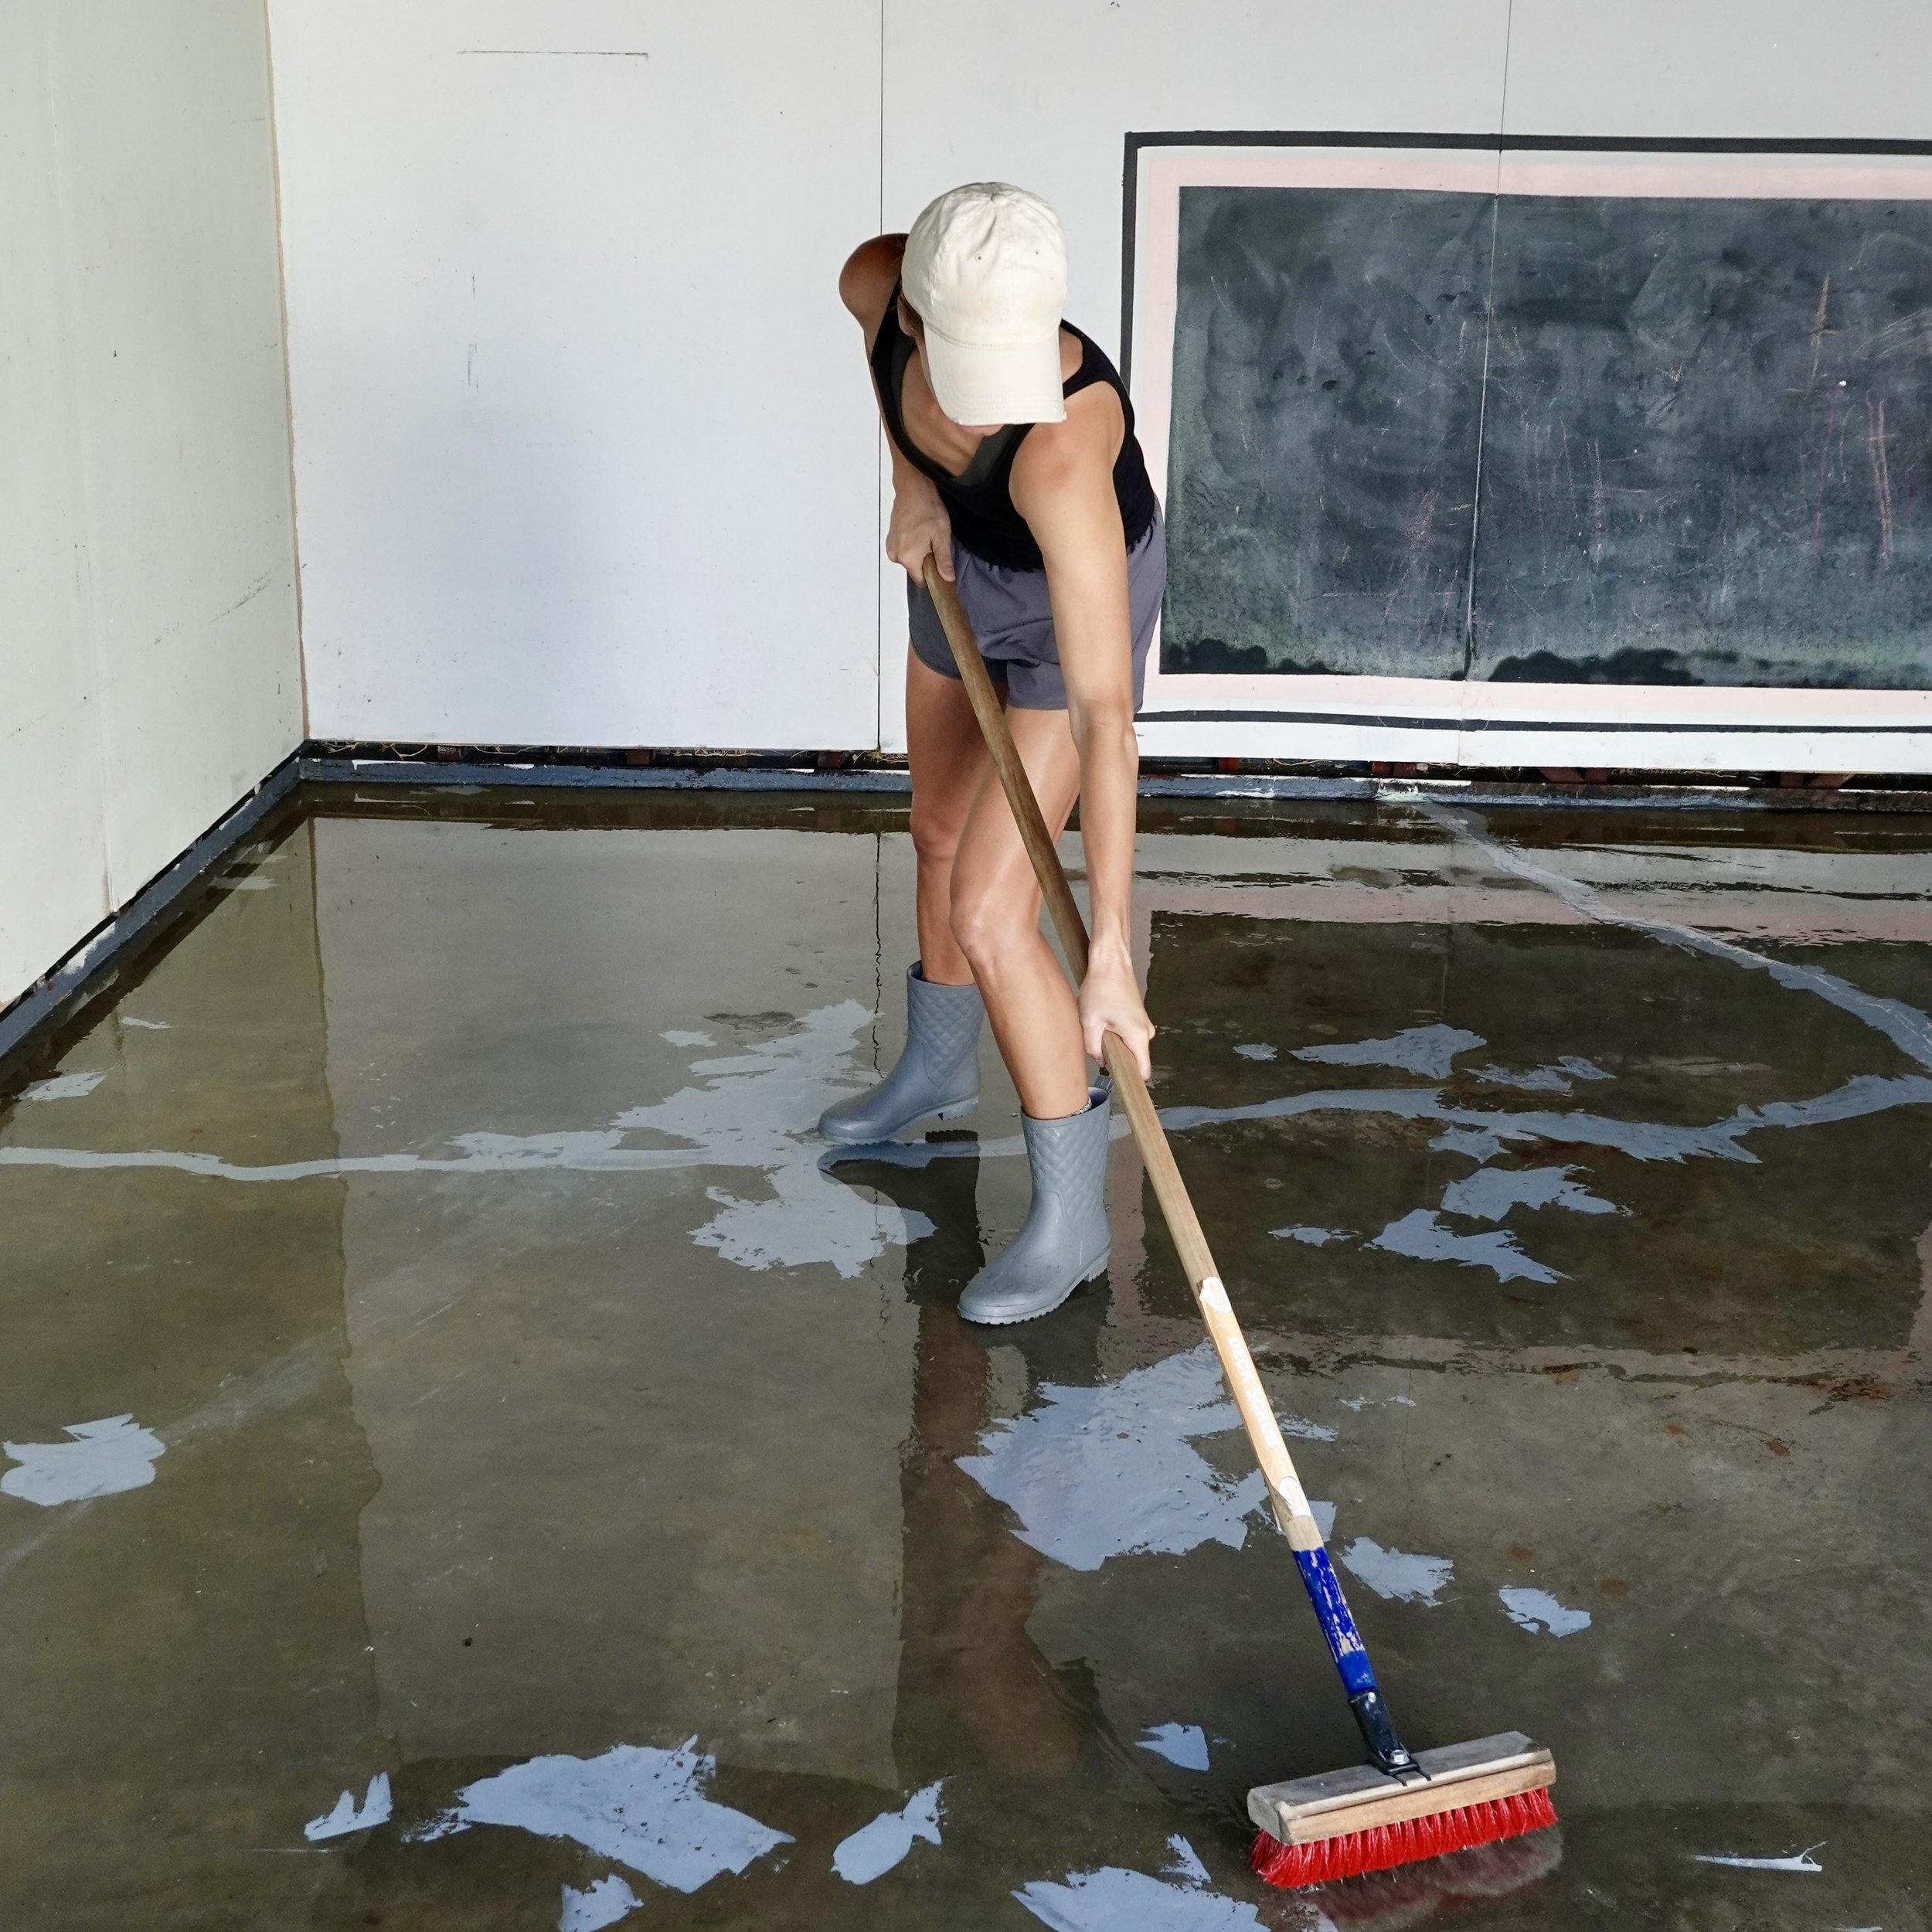
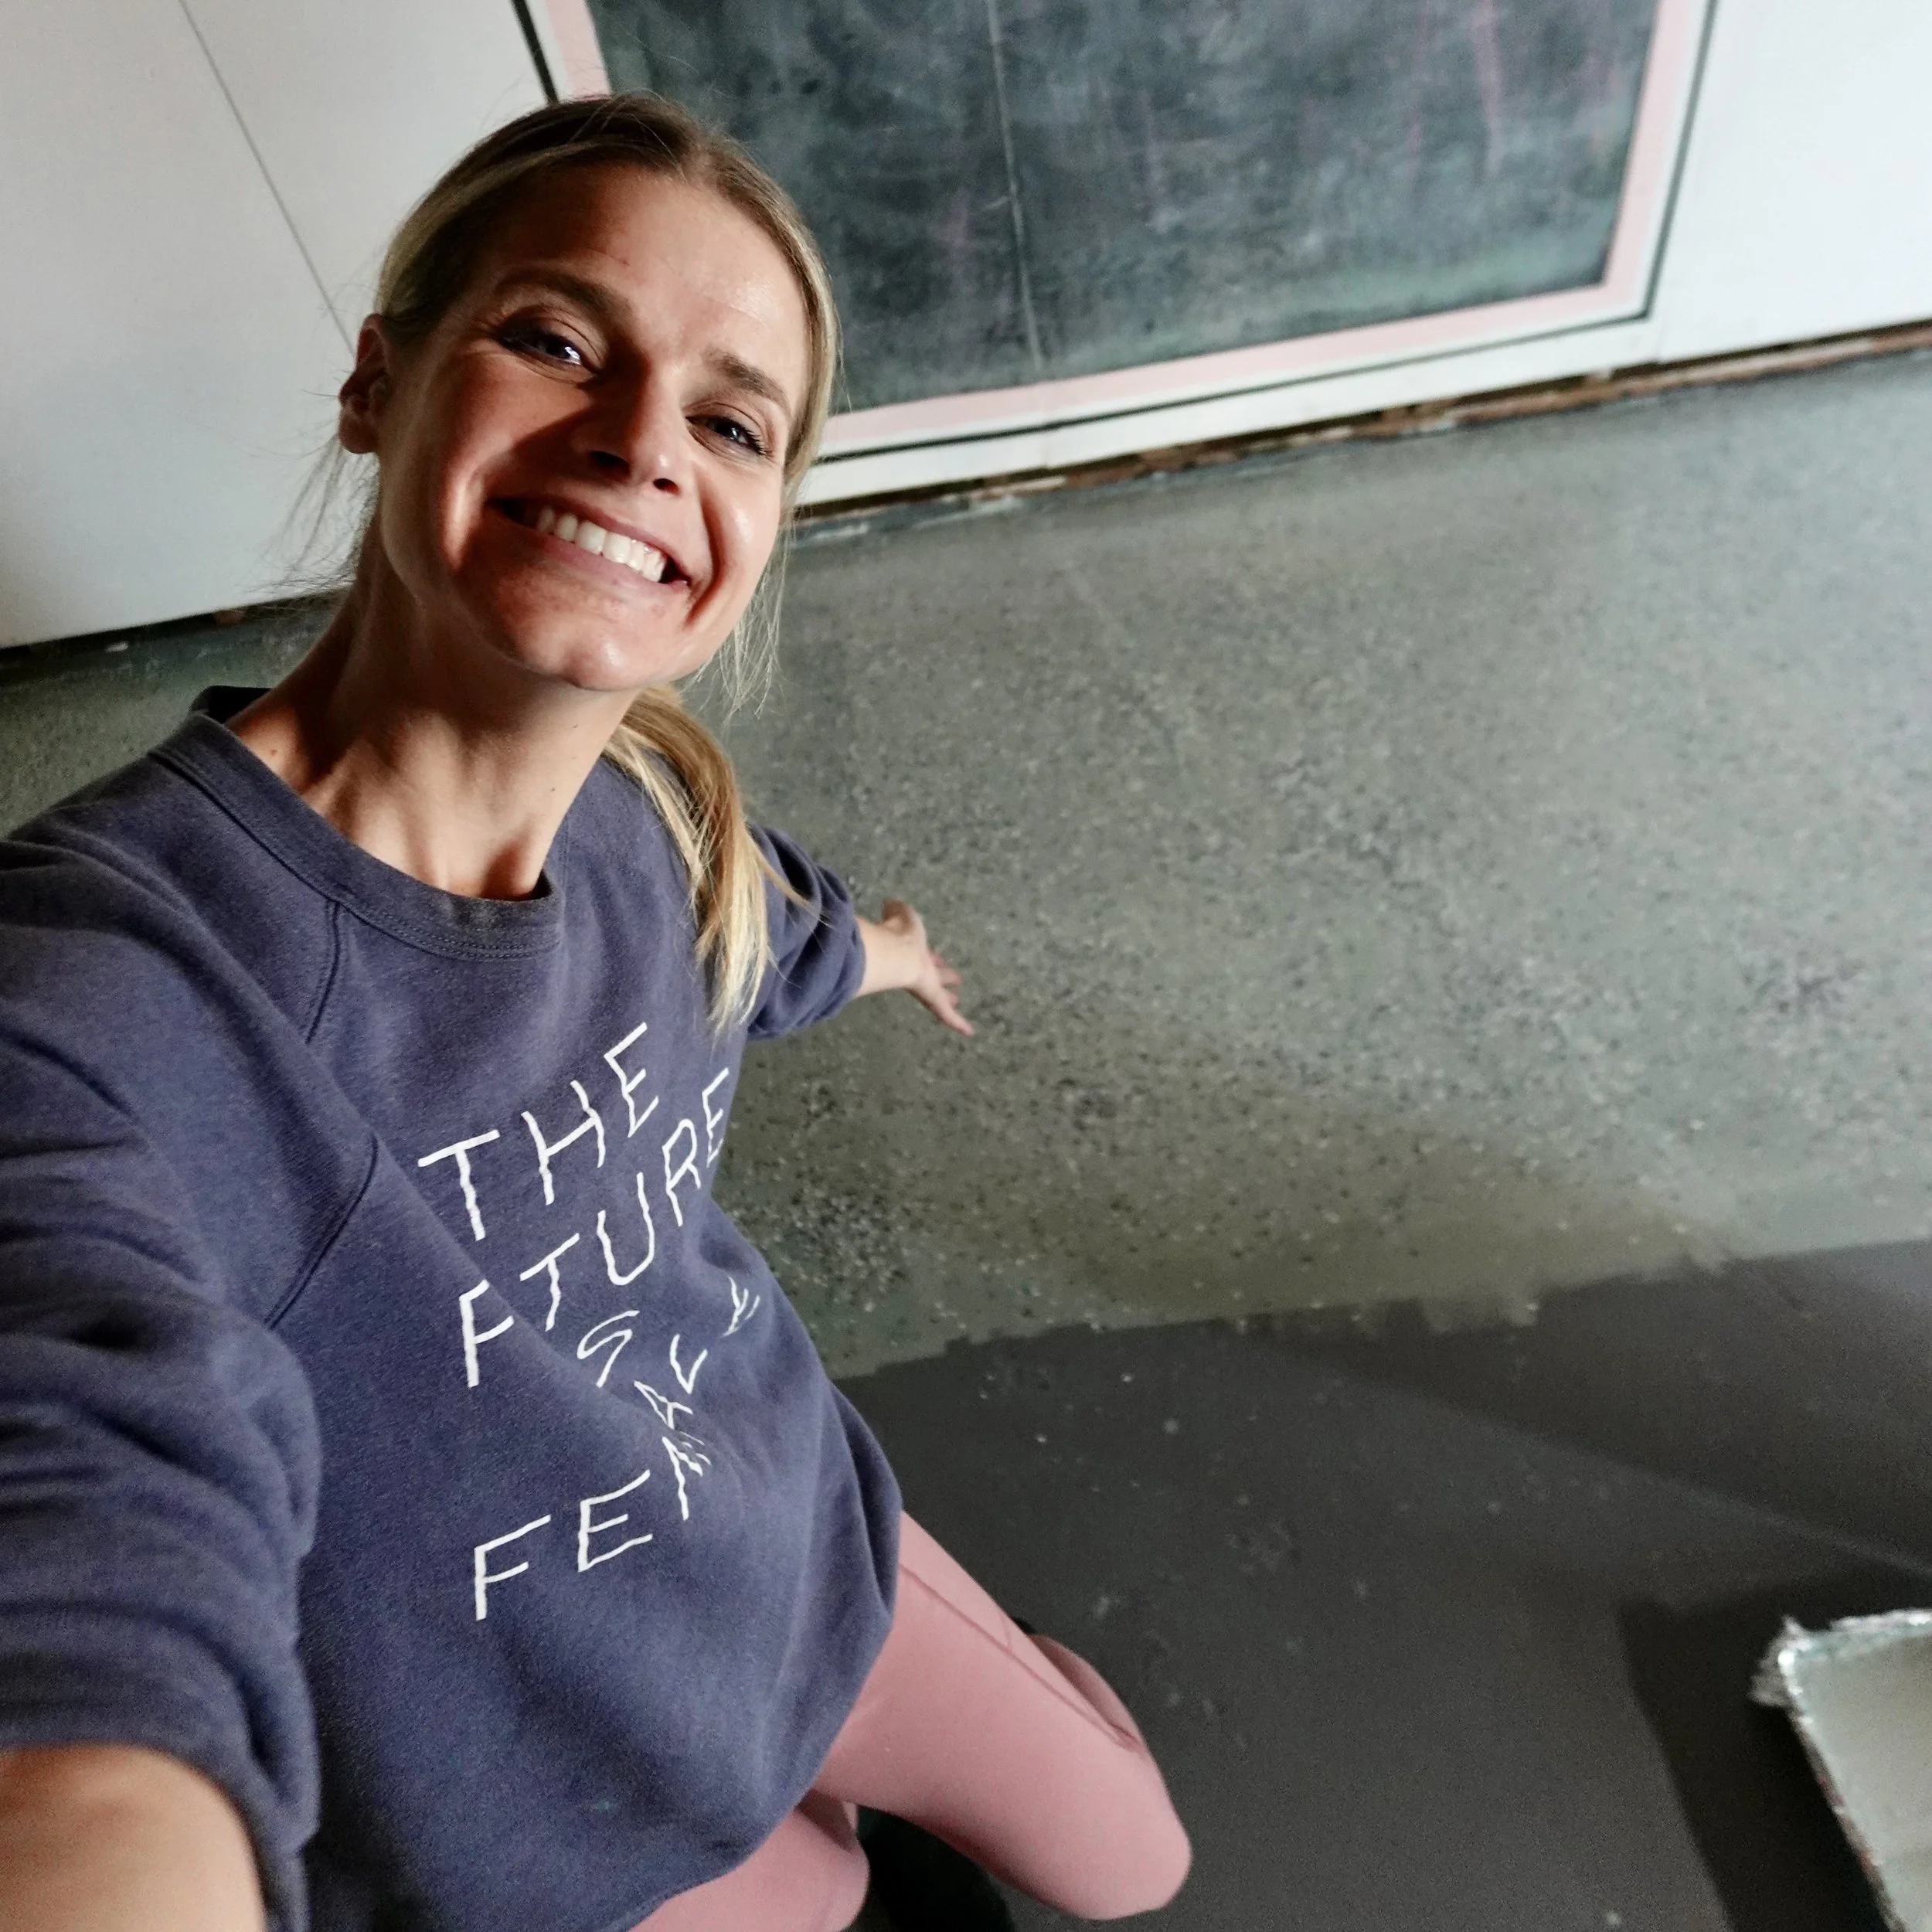
The final step in prepping is to etch the concrete. This helps open the pores for the epoxy to be able to really adhere and last. The Rust-oleum Epoxy Shield Garage Floor Coating Kit comes with the etching product. We followed the directions by wetting the floor, diluting the solution, letting it sit for 1-2 minutes, then scrub and rinse, rinse…and rinse again. We split the garage in half and did it in two parts. And then let it dry for 24 hours.
[Something to be aware of when etching! If you notice a white type powder after it dries like we did {you run your hand over the floor and white is on it}, you either let the etch sit too long before rinsing or you didn’t rinse enough. You do not want to move to the next step if this happens! I used our pressure washer and rinsed like crazy to get all the residue up. Looking back, I would have broken the garage into smaller sections to help eliminate it sitting on longer than it should.]
And one last note before we move to step 2. The etching residue really scared me, so I did some research and decided to add a coat of primer using Rust-oleum Concrete & Garage Recoat Primer. This absolutely isn’t necessary, but I decided it couldn’t hurt. We then let that fully dry 24 hours.
Step 2: Epoxy
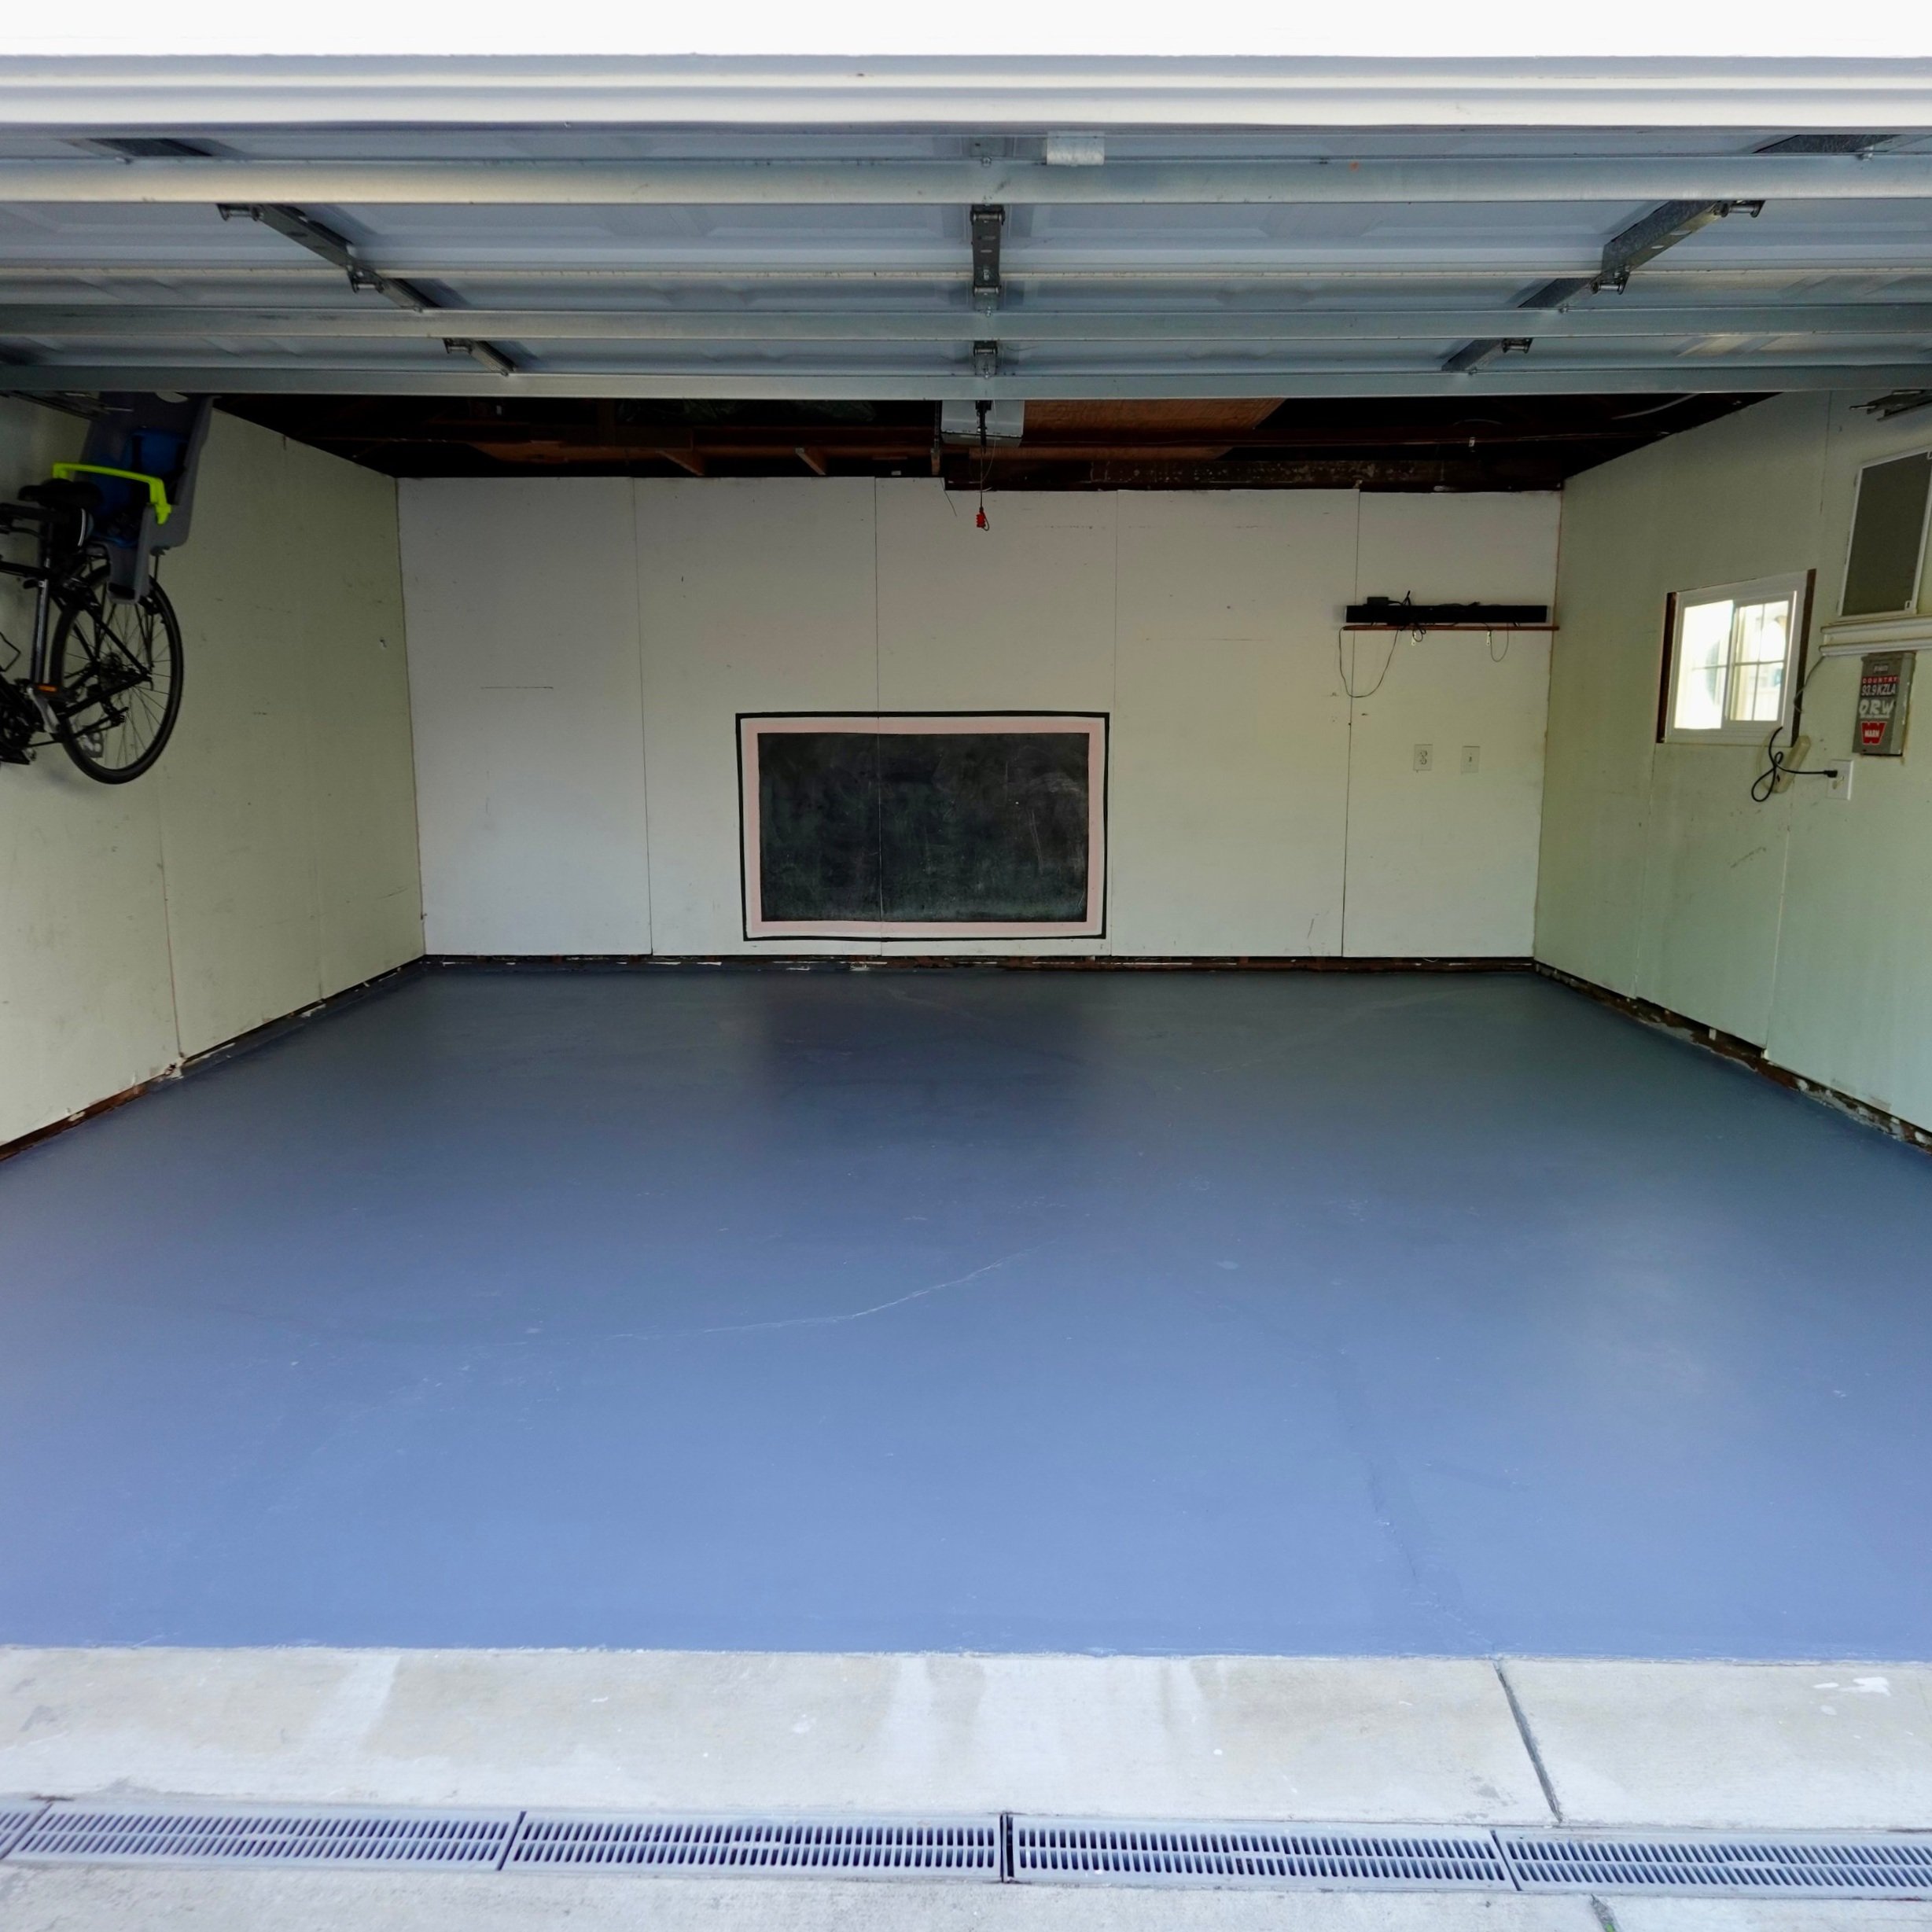
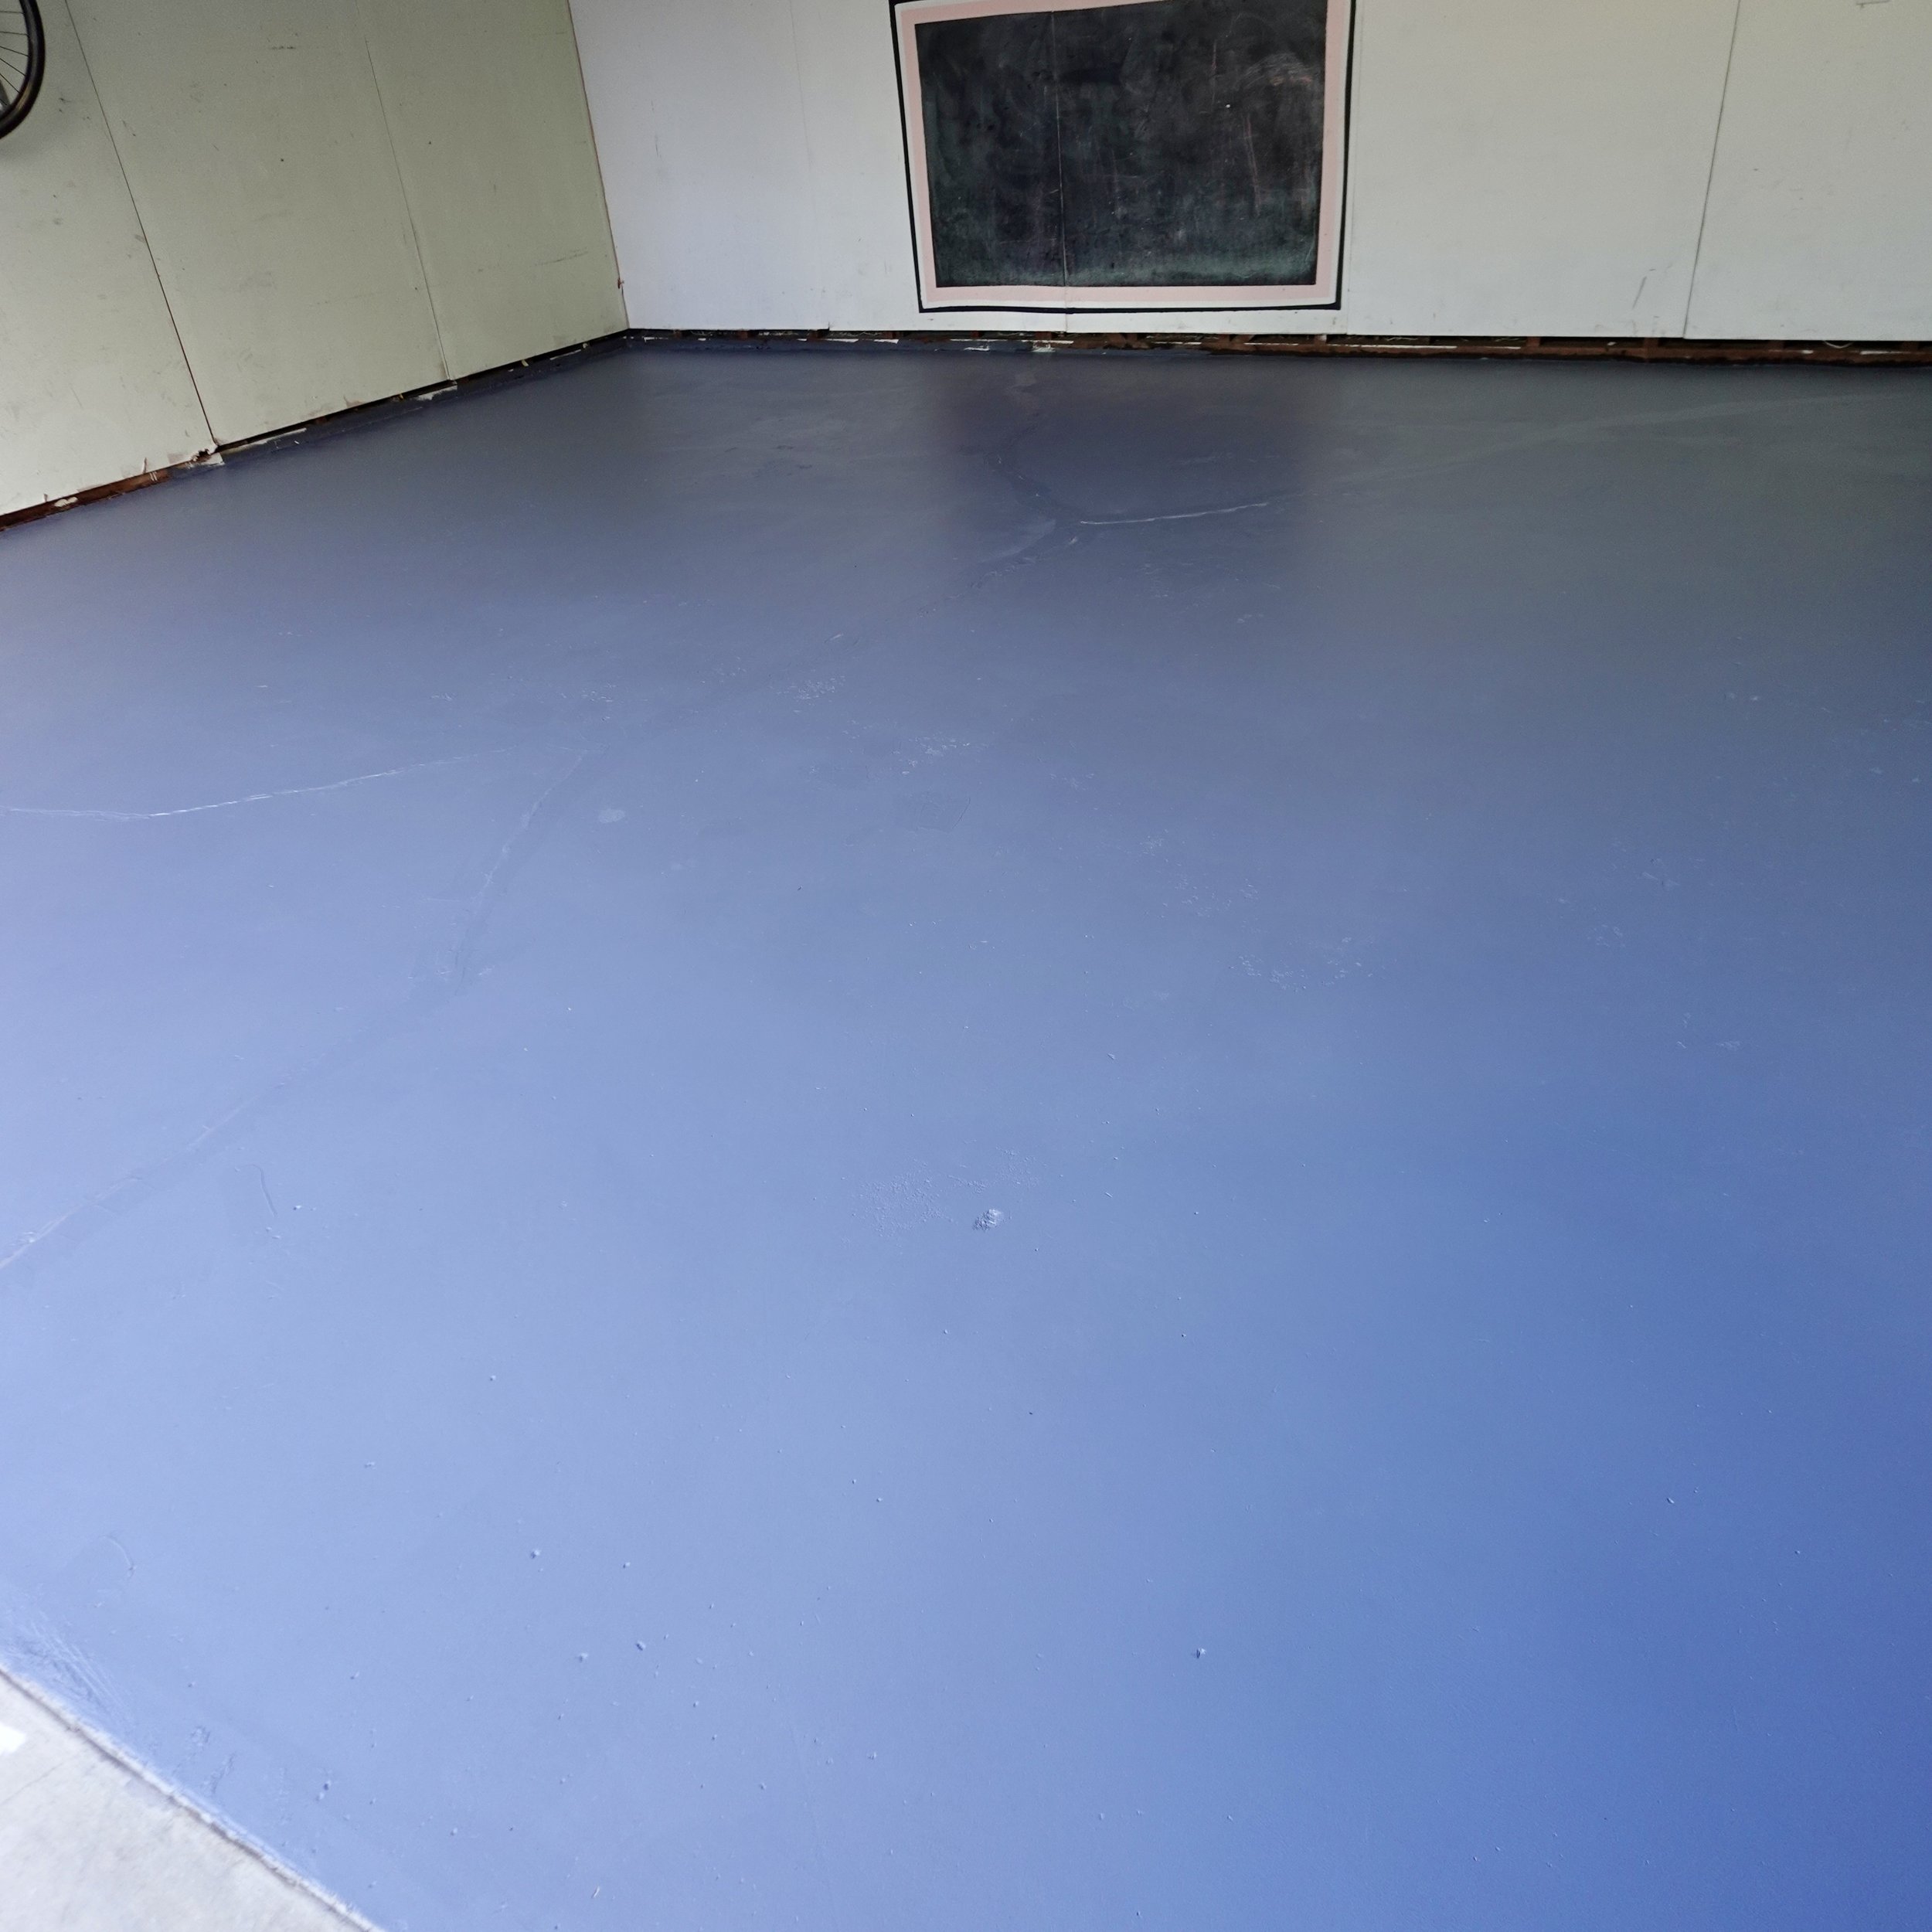
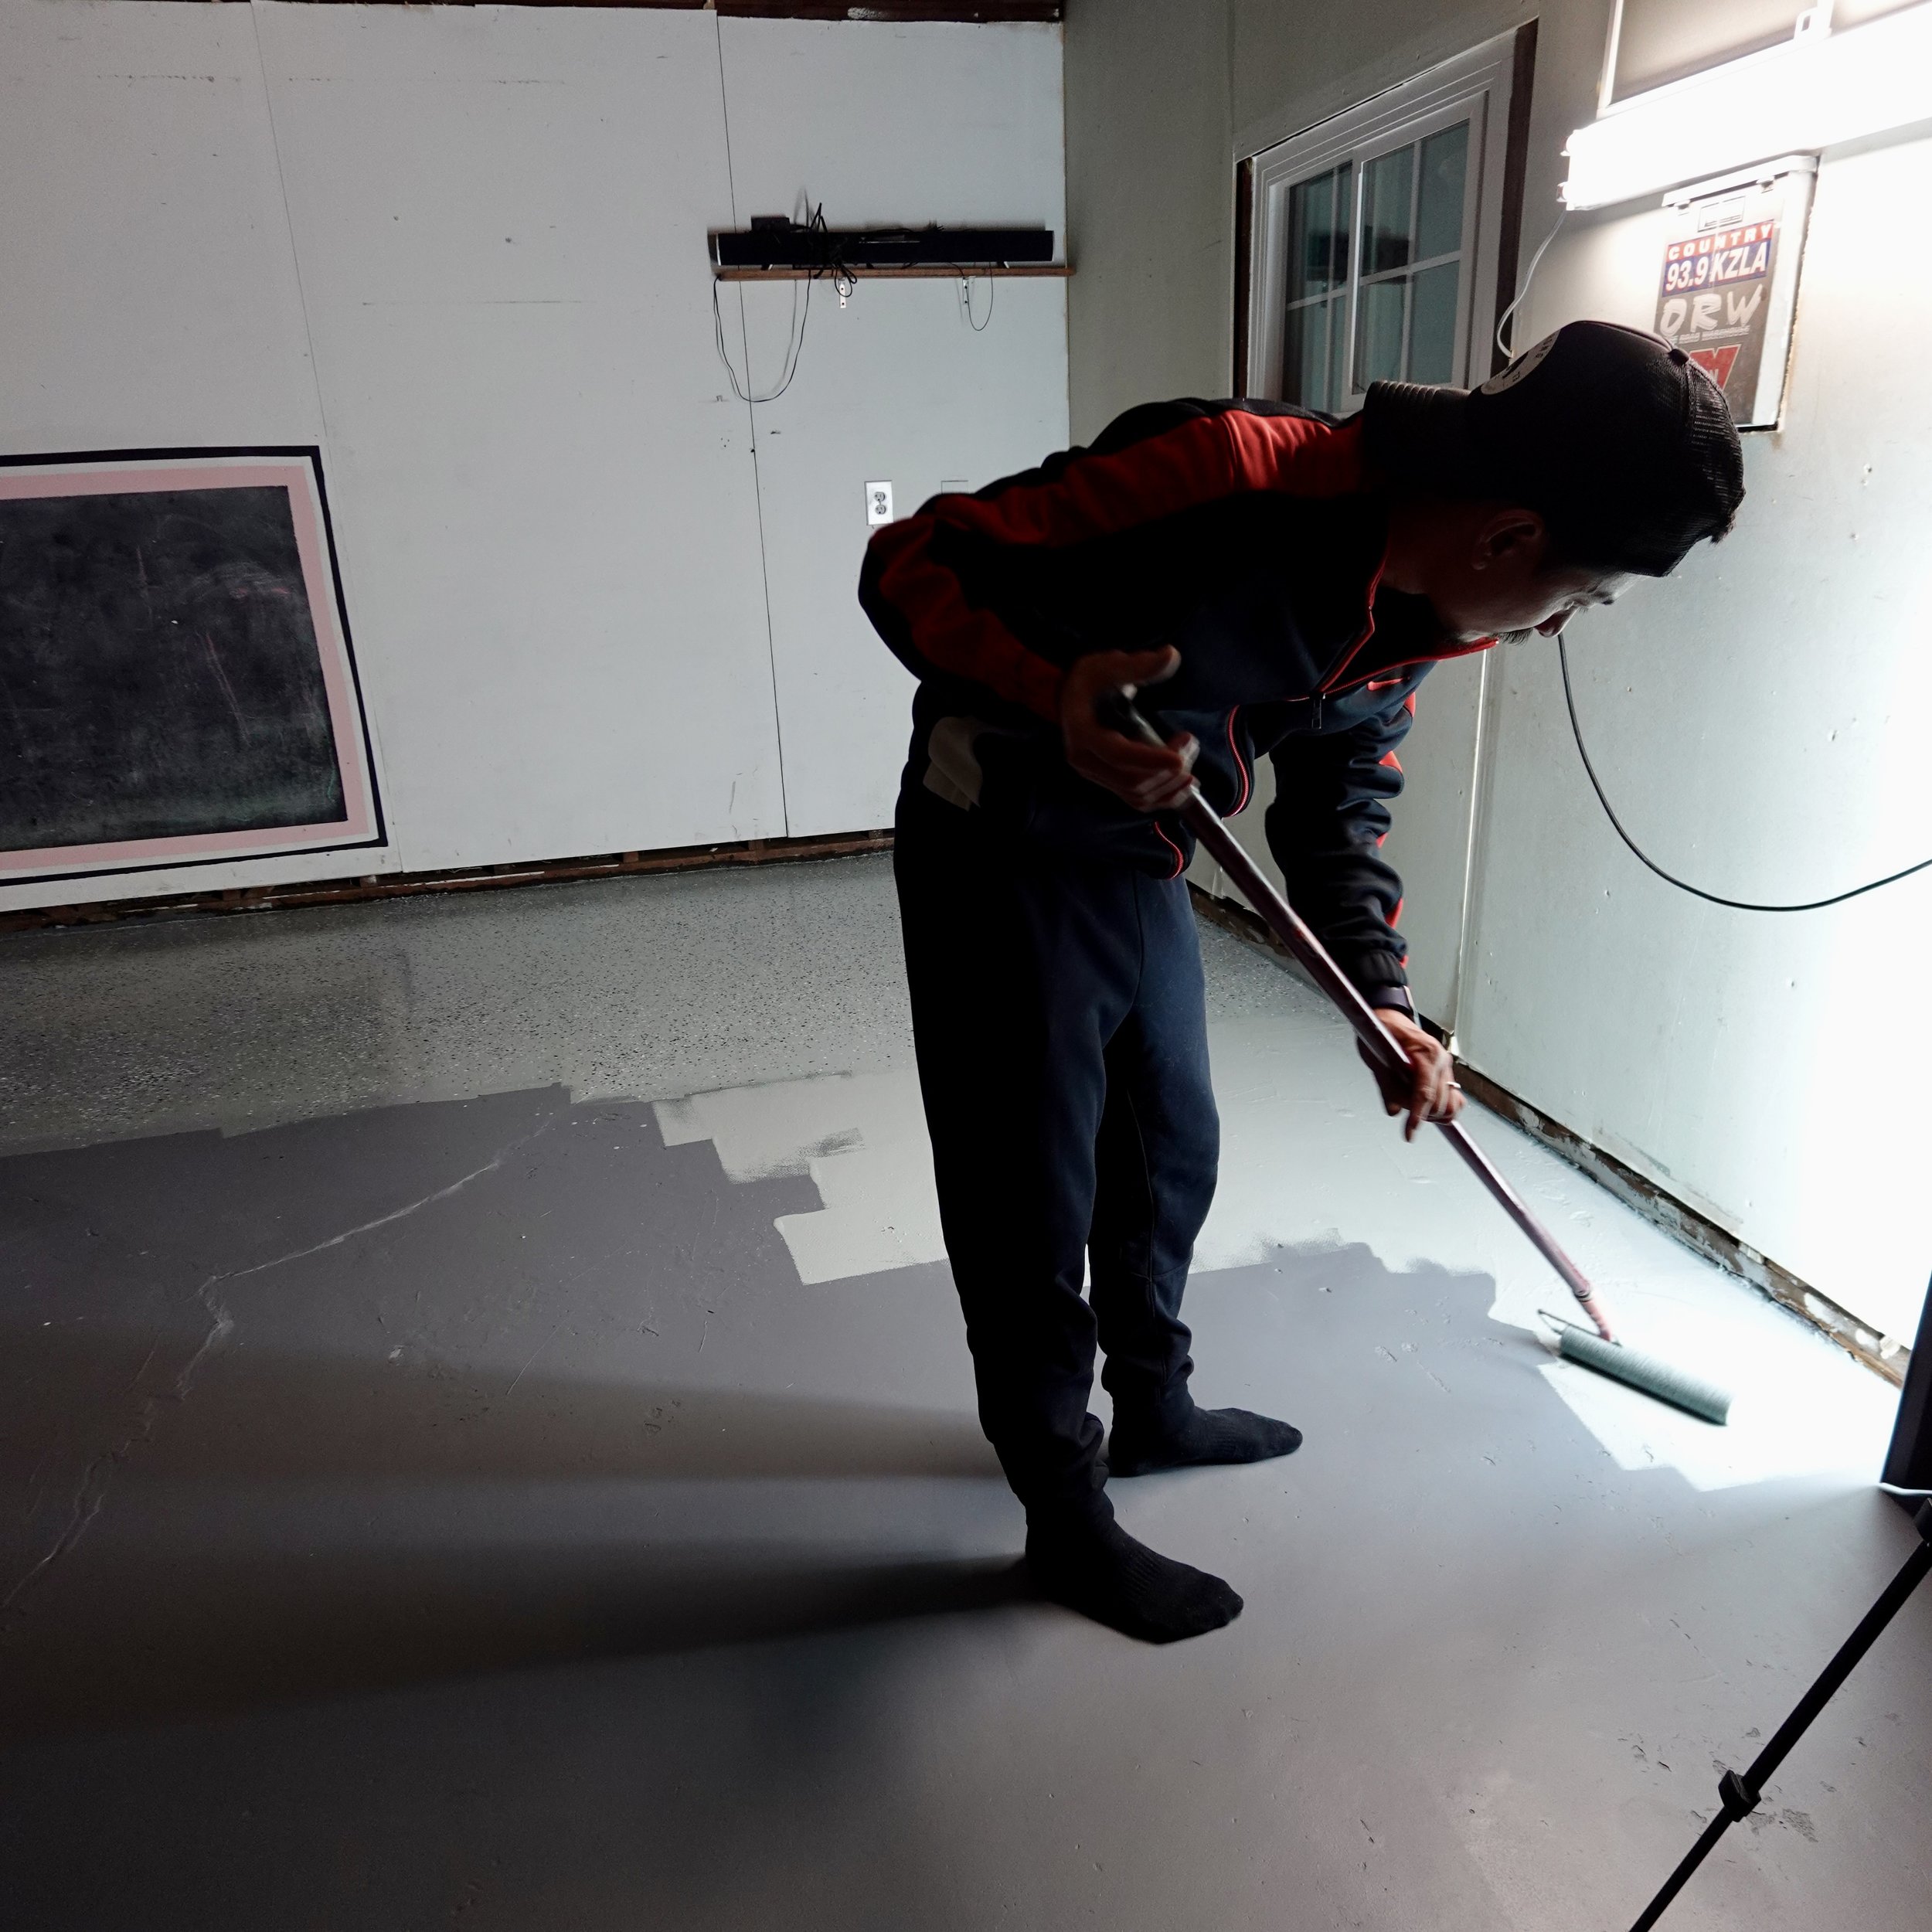
And now it is time to epoxy! This is the fun part. The Rust-oleum Epoxy Shield Garage Floor Coating Kit from Lowes is tintable to a variety of colors. We decided to get a little crazy and tinted it to the color Seafoam. The epoxy is a two part system that you mix together when you are ready. After you mix, you let it cure for a specified time, depending on the weather. Working in small sections, I went through with a brush on the edges and Ron used a roller to fill the area. After each section, while the epoxy is still wet, we spread the decorative color chips that come in the kit. Because of how many cracks and irregularities our garage had, we opted to get an additional bag of decorative color chips to hide all the imperfections. Repeat until the space is finished and let it cure before the last and final step.

Step 3: Seal
I am going to be honest…this step was messy and not my friend {and the most expensive part}. But from all my research, adding in the extra top coat helps provides a long lasting durability.


Before applying the Rust-oleum Epoxy Shield Top Coat, we went over the floor with our shop vac to get up an loose paint chips. We then mixed the two part epoxy system and added in the included antiskid additive. Following the same process as the epoxy, we went around the perimeter with the brush and then rolled the area in small sections. The top coat definitely gave us the most challenge with ensuring that it went on evenly in all areas. So go slow and be okay with some imperfections…it still looks amazing in the end. Even though it said one kit was for a 2.5 car garage, we ended up having to use 2 boxes.

And that was it! The whole process, from cleaning out the garage until the final touch, took us two weeks. However, a lot of that was dry time and living our daily life. You can check out the whole process in reel time here!
Thank you for coming along this garage journey with me. Stay tuned for the next part of our garage makeover…creating a functional and pretty workshop. And if you ever epoxy your garage, send a pic my way so I can see!