Step-By-Step: Make Your Own Apothecary Cabinet and Save Money
/A few years ago, I went on the hunt for a vintage apothecary cabinet for under our tv. Two big problems occurred. One, I wanted a very specific size to fit the wall. And two, everything I found cost way more than I was willing to spend. So we came up our own solution....make one ourselves. Instead of starting at ground zero, we bought basic dressers from Ikea and transformed them into our dream apothecary cabinet.
When we did the original one in our family room two years ago, I had no idea if it would work and did not document it. So when it came time to do another one for our bedroom, I knew I needed to take all the pictures. I will go through how we did the one in our bedroom step-by-step {this is a smaller, easier version} and then discuss how we made it bigger for the family room.
The great thing about this is there are so many different variations that you can do to make it your own. It doesn't take a lot, just a few simple tools, some wood to make it look like drawers, some trim pieces to make it look finished and drawer pulls to finish it all off. And of course stain and paint ;)

Here is a general list of materials. I will go through them all more in detail throughout.
General Materials for Apothecary Cabinet:
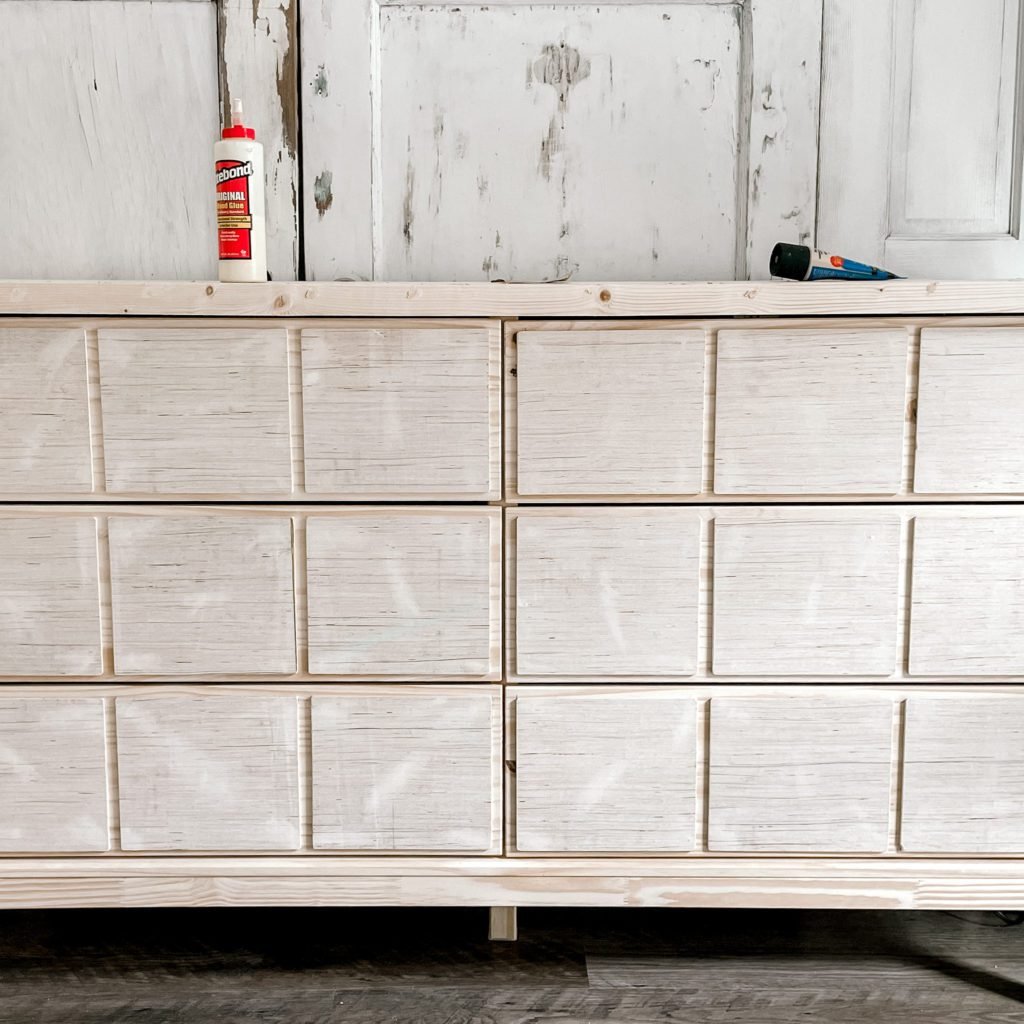
5 mm Plywood cut down to 8" x 9" for the drawer fronts
1" x 16" wood piece to add on top for thickness
1 x 2" trim piece for the top
Baseboard trim piece for bottom (this depends on how you do the bottom)
Paint & Stain
Drawer Pulls (bedroom pulls & family room pulls)

*This post contains affiliate links – see my full Disclosure here*
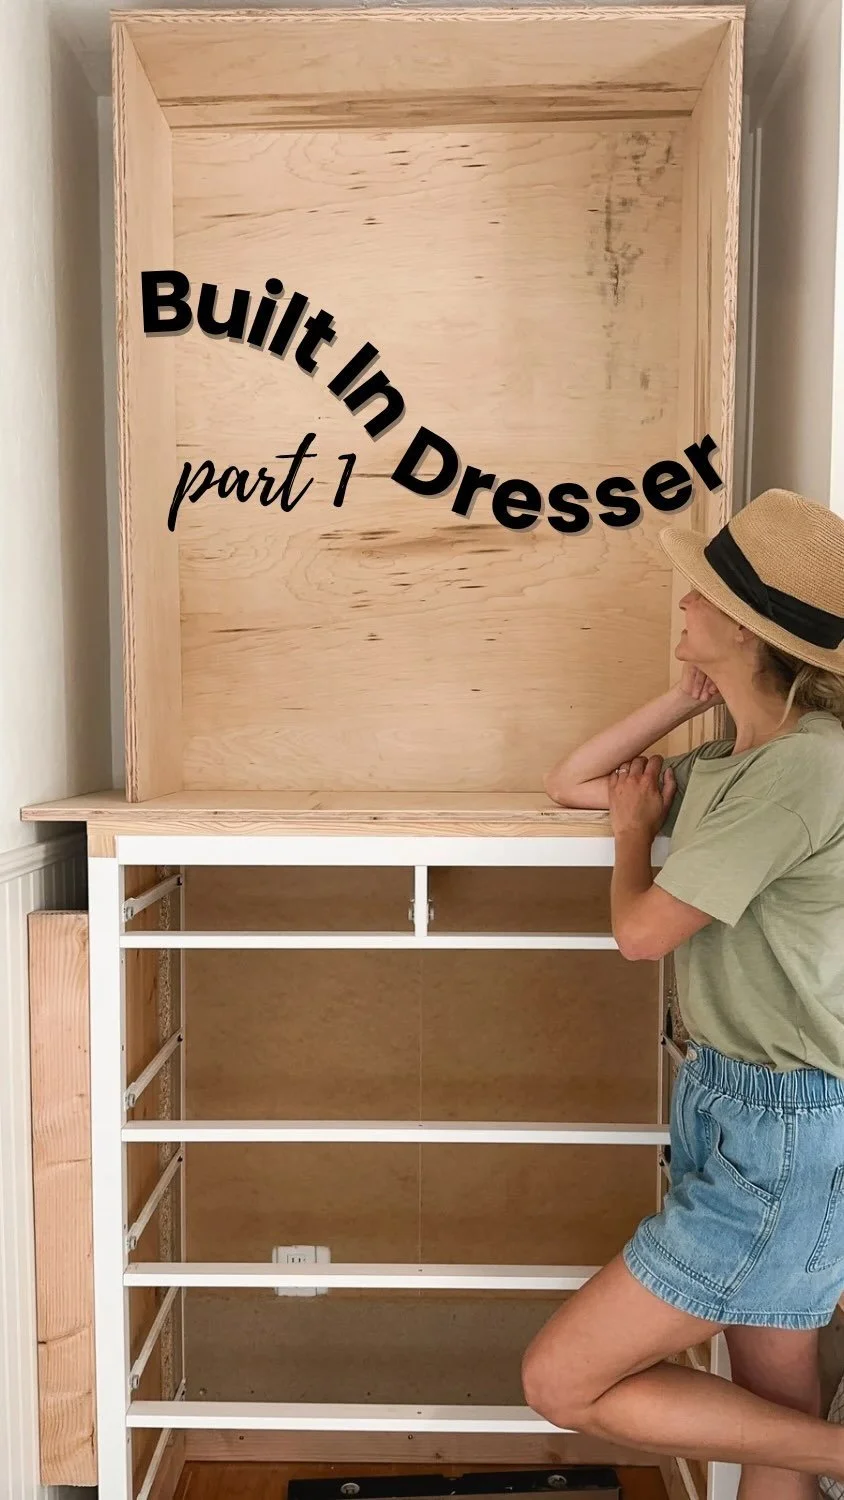
First thing is to get the Tarva 6 Drawer Dresser from Ikea and put it together. We didn't do any modifications for this.

Next, we cut the 5 mm plywood down to 8" x 9" rectangles. This will allow for 3 to fit on one drawer. We found it easier to use a table saw, but a miter saw will also work {or you can have lowes/home depot cut it for you}.

To attach the drawer, I didn't do anything fancy. I measured where I wanted them to go and used a level to help place them. Once I marked where each 'drawer' would go, I used wood glue and 3/4" brad nails with the air compressor at a lighter pressure to help secure in place while the glue dried.

This is when you start to see the transformation take place! But it still looks like an ikea dresser.

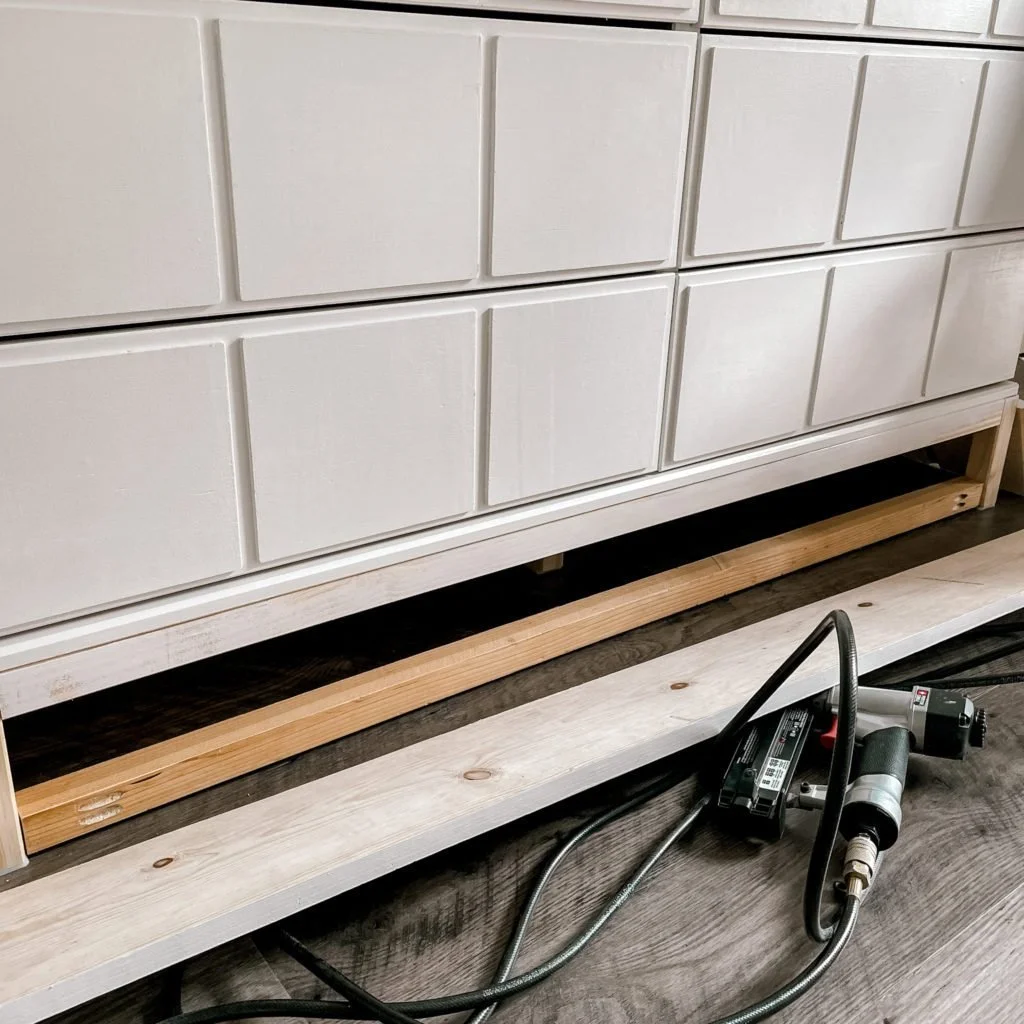
In order to be able to add a 1" x 2" wood trim to the top, we first had to add a 1" x 16" board. We found this exact size at Lowes and cut it to the length needed. We used wood glue and 1 1/4" brad nails to secure it. Then we were able to add the 1" x 2" trim to the top.

The last thing was the baseboards. For this one in our room, we decided to keep the legs attached because we needed the extra height for our tv {any lower and our bed frame would cut off the tv when laying in bed}. We used a 1" x 8" trim for this and it fit perfectly. We first added a scrap piece of wood on the bottom to help secure the baseboard.
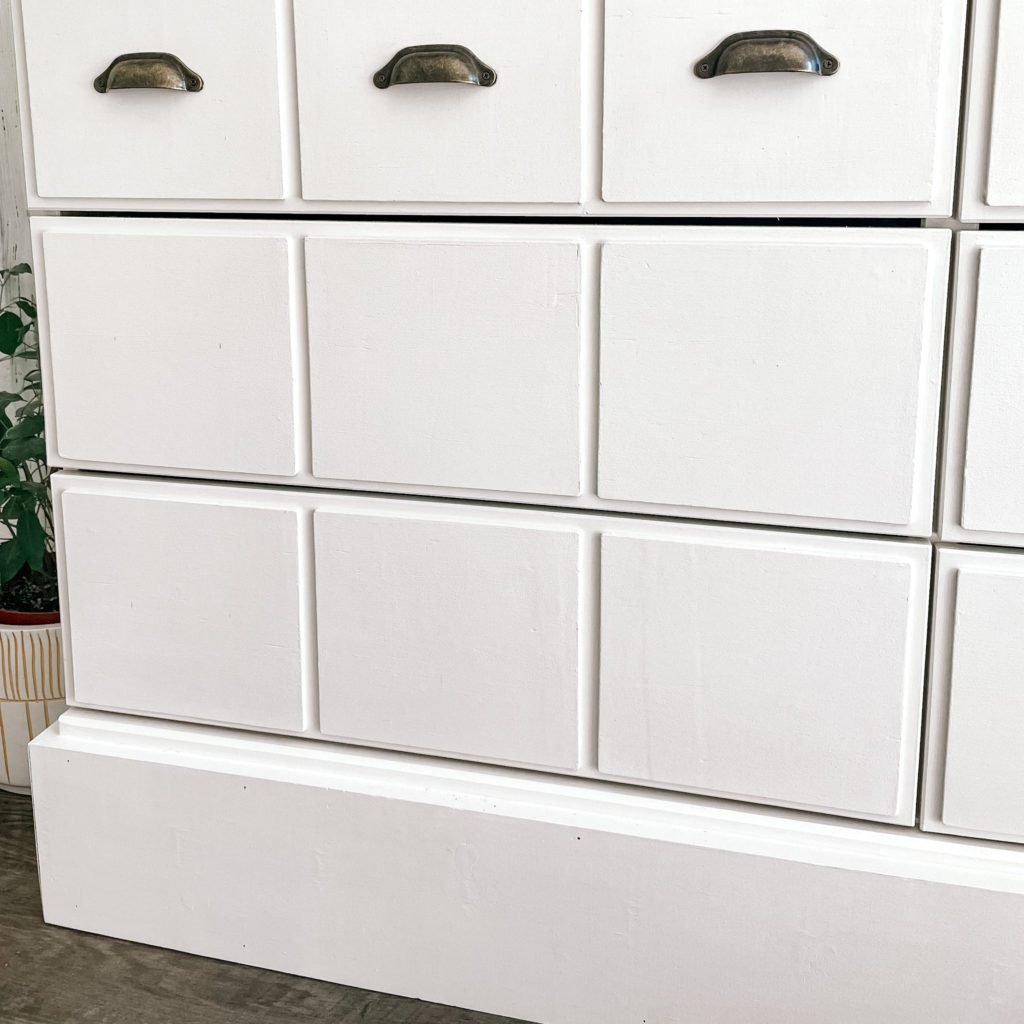
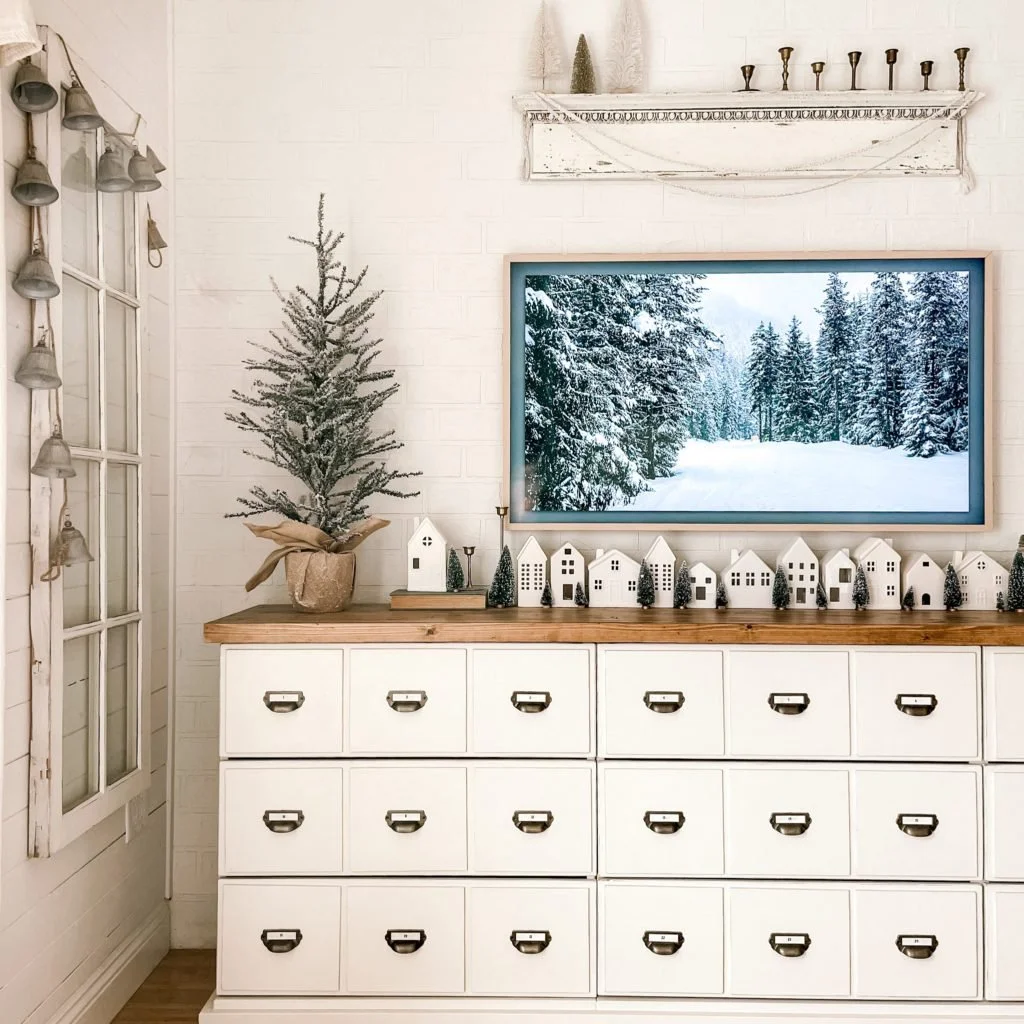
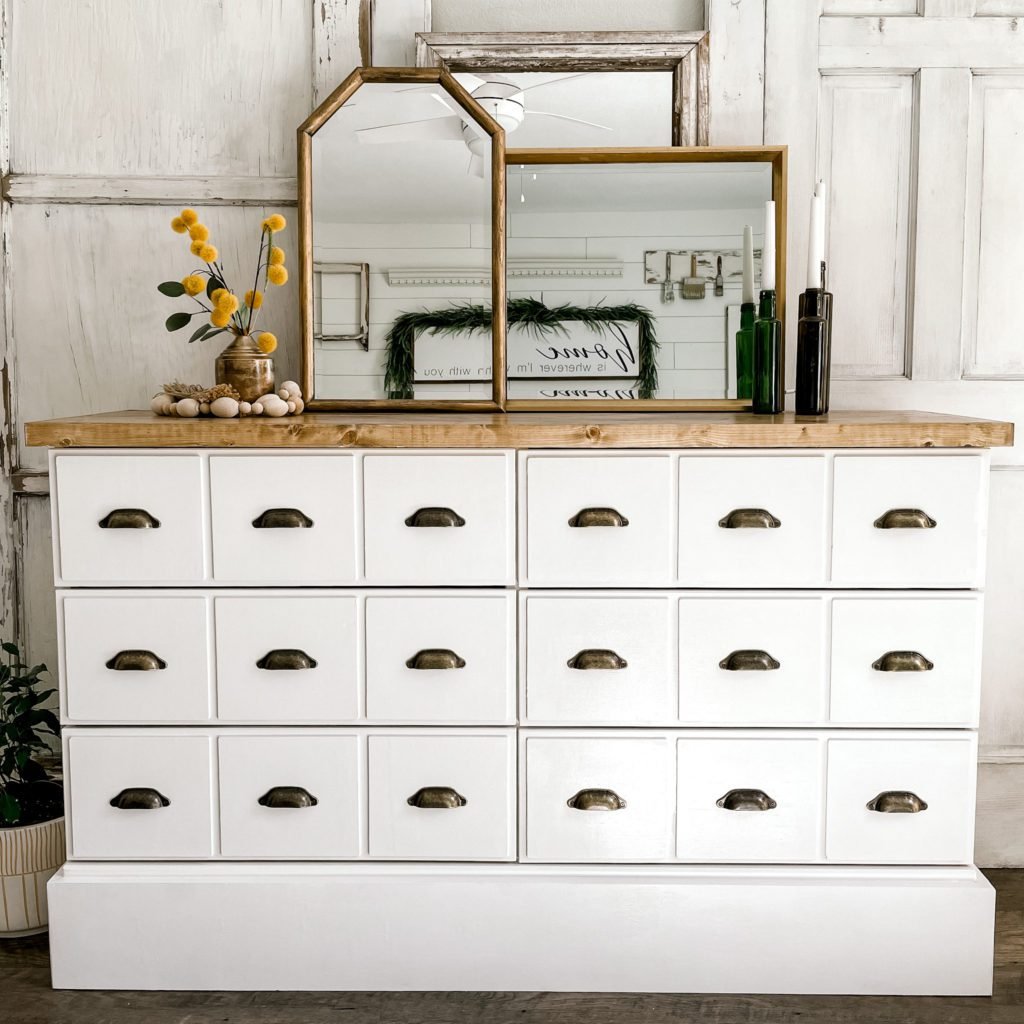
Next, I stained the top and painted the base. As always, I used my favorite Fusion Mineral Paint for the base and a custom stain for the top.
The final touch was adding the pulls! We used these in our bedroom and these in the family room...both great options!

9 Drawer Dresser
For the one in our family room, we wanted a bigger piece to span the whole wall {I highly recommend the bigger 9 drawer piece if you have the space...it makes a huge impact}. To make this happen, we got a 6 drawer Tarva dresser and a 3 drawer Tarva dresser from Ikea.
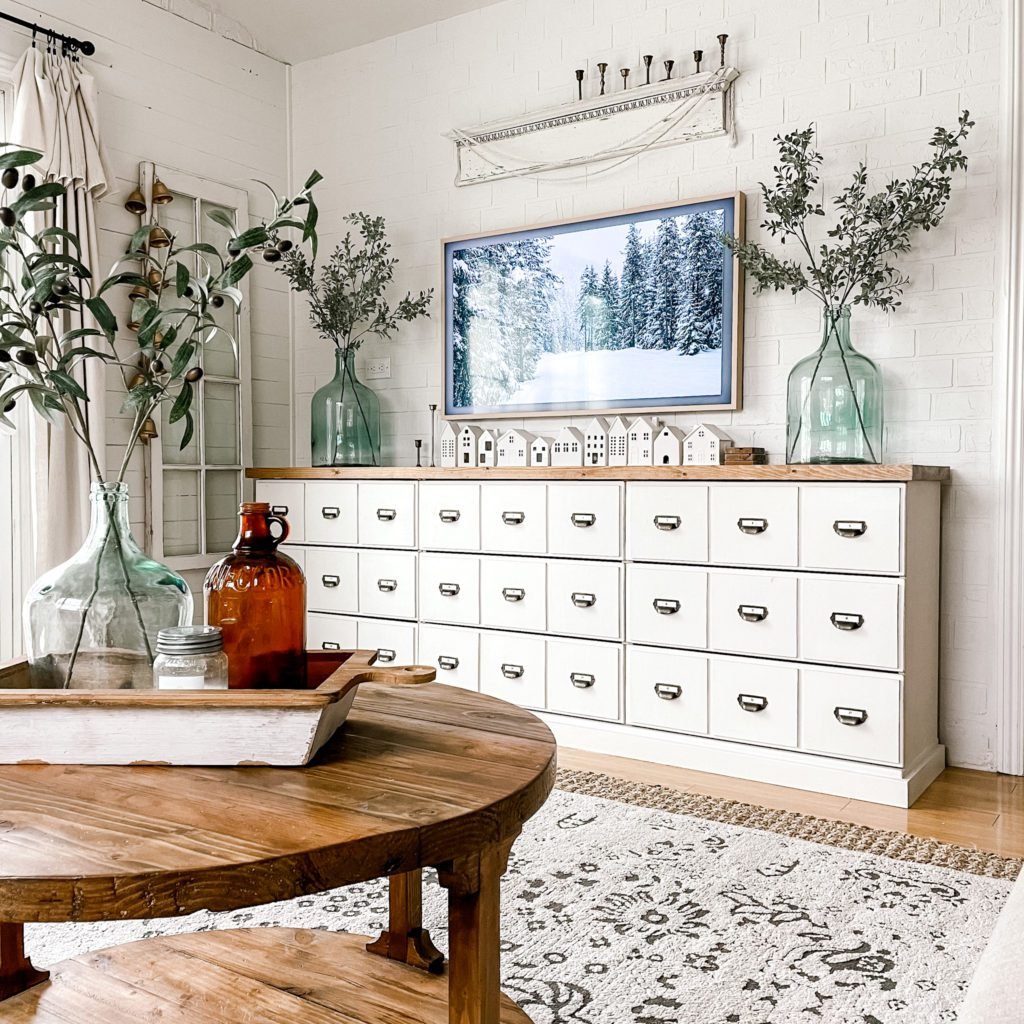

Then we followed the same steps as we did above. The only other difference is because it was lower to the ground, we used a 1" x 3" baseboard instead.

I have a highlight in my stories on Instagram where I talked about this project after finishing the first one and answered some questions. Feel free to check that out or let me know if you have any questions!

Thank you for being here. Mean it!